BeSmart.cash
The purpose of this page is to provide all the basic information so that you can connect quickly and easily to smartBCH - sidechain for Bitcoin Cash
- Version: 1.12
- Author: Smartverse
- Created: 1 April, 2022 (no, it's not a joke :) )
- Update: 15 May, 2022
If you have any questions that are beyond the scope of this help file, please feel free to message to our Telegram channel.
Install Metamask
MetaMask is popular crypto wallet available as a browser extension and as a mobile app. In the following part we will go through the installation of MetaMask on your computer as a browser extension, as well as the installation of the MetaMask application on your mobile for android and iOS.
If you want to use the same wallet on both your computer and your mobile phone, first install it on one device and create a new wallet and then install it on the other device, but after installation choose the option to import an existing wallet based on the recovery phrase. Following the steps below will probably indicate when you need to do this. In any case, we will only focus on creating a new wallet in this manual in both cases. We believe that based on this, it will probably be clear how to import an existing one.
Browser Extension
In this section, we will go through the installation of MetaMask as a browser extension on your computer.
Step 1:
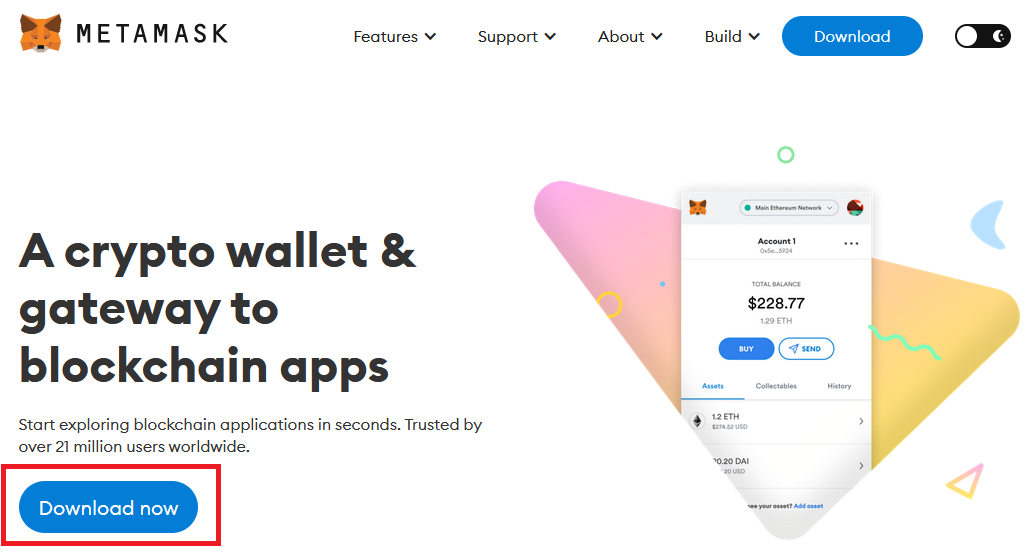
Visit the MetaMask page, which at the time of writing this manual looks like this and click on the Download Now button
Step 2:
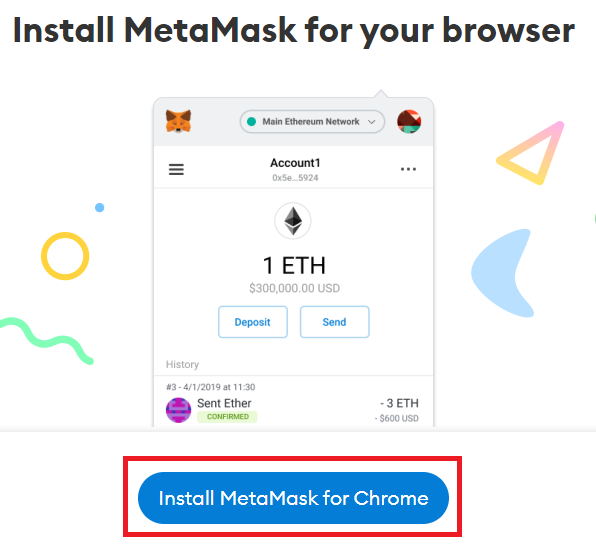
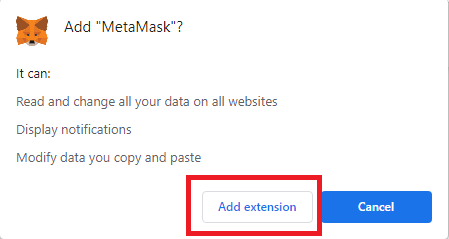
You will then see the Install MetaMask button for the browser in which you visited the site (eg Chrome, Firefox). Click on Install MetaMask.
Step 5:
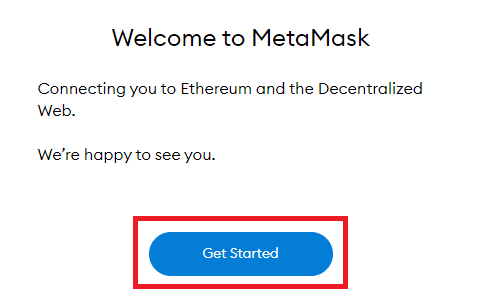
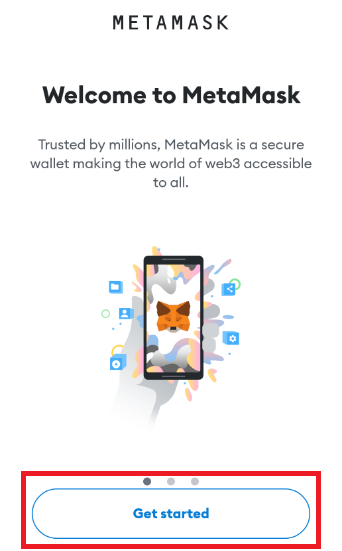
In this step, MetaMask is successfully installed and you will see a Welcome message with the message "Connecting you to Ethereum ..." Etherum is the default chain to which MetaMask connects. In the settings, however, it is possible to switch to other chains, which we will talk about in the section "Connect to smartBCH". Now click on Get Started to create an ETH style address.
Step 6:
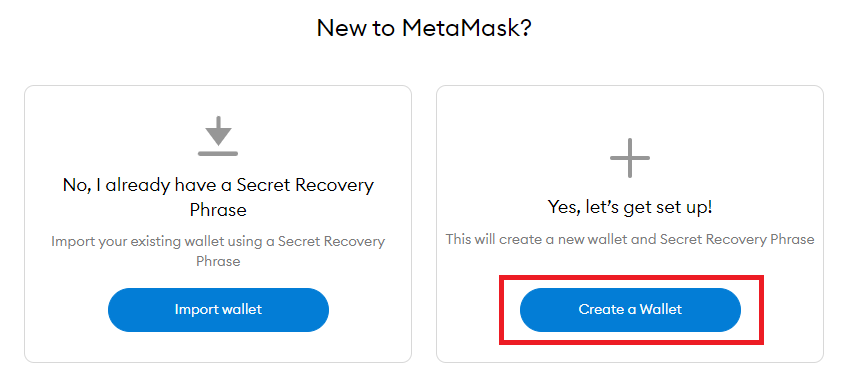
If you already have experience with MetaMask, you can also import an existing wallet or create a new one in this step. In any case, if this is your first experience with smartBCH, it is not a bad idea to create a completely new wallet by clicking on Create a Wallet. However, if you have already installed your wallet on your mobile device and you want to use the same, select the Import wallet option first.
Step 7:
You must enter a password to access the wallet. The password should meet all the requirements so that it is secure. It is also a good idea to save your password somewhere safe. A Password Manager application can be used for this purpose. I have a very good experience with this one: KeePass
Step 8:
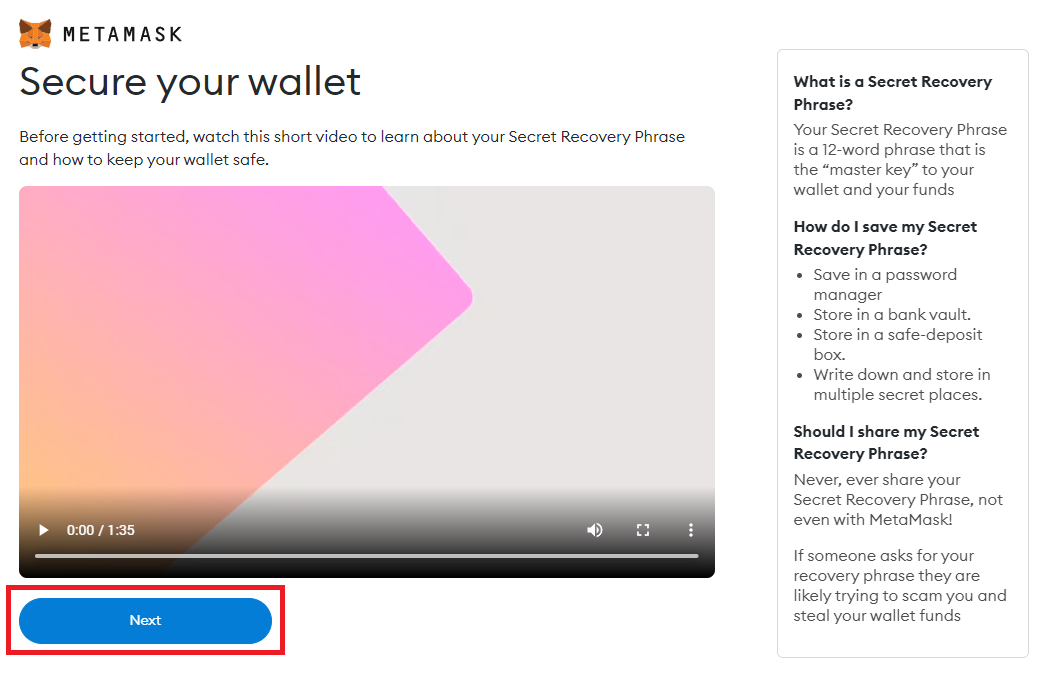
To learn more about how to protect your wallet and what the Secret Recovery Phrase is, watch the following video, which will be displayed after entering the password and click on the Next button.
Step 9:
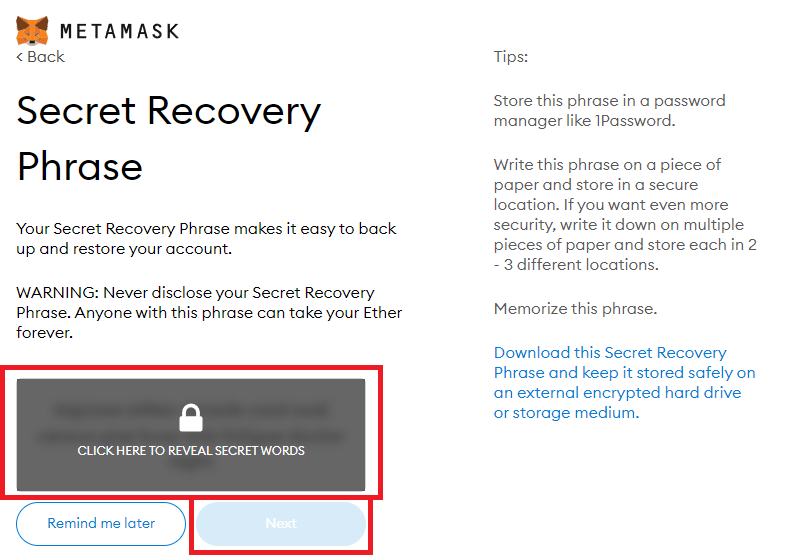
The Secret Recovery Phrase helps you recover your wallet. In this step, you can display the phrase by clicking on the gray area with the text: Click here to reveal secret words. Save the list of words there as well as the password. If you lose them, you will not be able to recover your wallet if necessary, and you may lose all the funds you have in it. So ignore the "Remind me later" button and click on the secret words view and save them now, then click on the Next button.
Step 10:
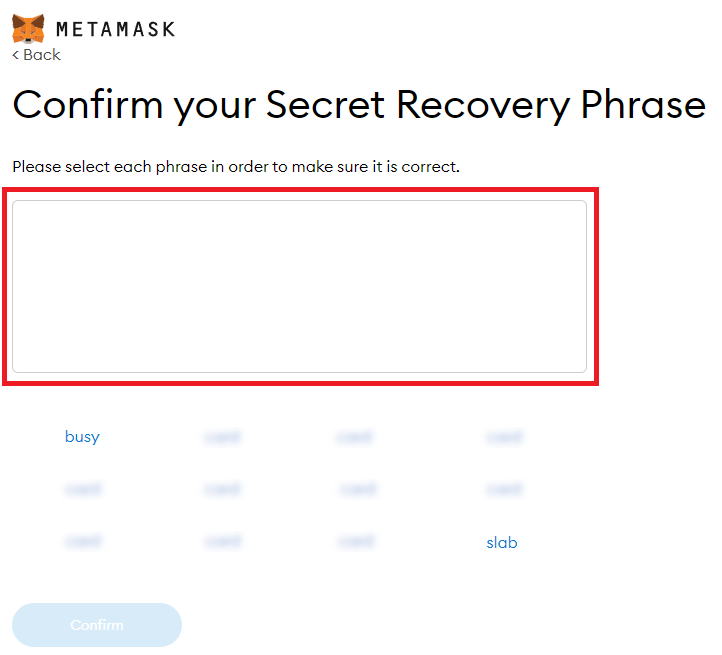
Just as the phrase was displayed to you in the previous step, click on the words to confirm your phrase in the same order.
Step 11:
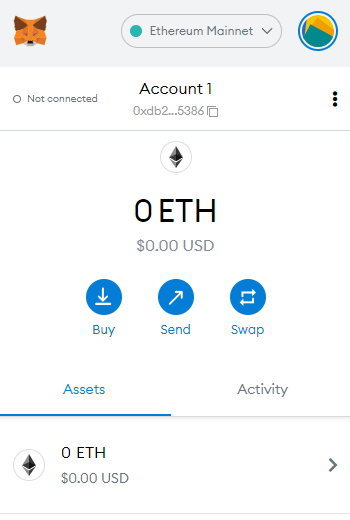
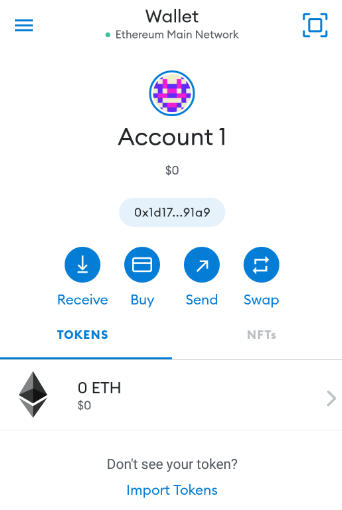
If you have put the phrase together correctly, your wallet is ready and you should see something like this.
Done:
The wallet is currently connected to the Ethereum chain, as we mentioned above. In the next step we will show how it is possible to switch to smartBCH. Continue in this section: smartBCH
Mobile
In this section we will show you how you can install MetaMask as an application on your Android or iOS mobile phone.
Step 1:
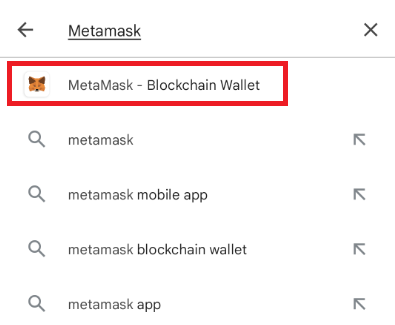
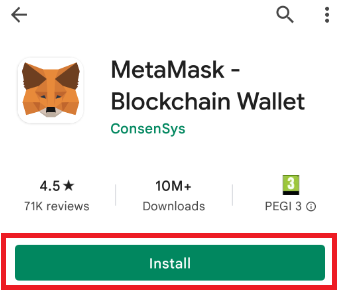
On your mobile, open the Play Store (Google Play) for Android, or the App Store for iOS and enter MetaMask in the search. Right in the first search results, you should see an application with a fox icon called MetaMask - Blockchain Wallet. Select this option
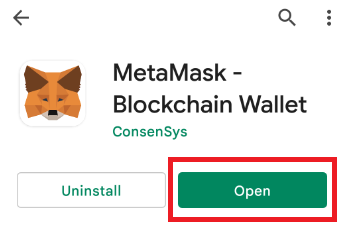
In the next steps, the application no longer allows you to take screenshots, so we have to make do with the description
Step 5:
Subsequently, as when installing MetaMask as a browser extension, you have the option to choose whether you want to import into MetaMask your existing wallet, or you want to create a new wallet. In the next steps, we will only focus on creating a new wallet. So choose the option to create a new wallet
Step 6:
MetaMask will ask you to create a password. Create a strong enough password and save it securely. If your mobile device supports it, in this step you can also choose to log in to MetaMask based on biometric data. Click this option for faster and more convenient access to MetaMask. At the same time, uncheck the checkbox to understand that MetaMask cannot recover your password if you lose it. Finally, click Create Password.
Wait a while for your new wallet to create.
Step 7:
Click Start, read the instructions and click Start again.
Step 8:
The application will prompt you to log in and show you a black box under which your recovery phrase is hidden. Click on View to reveal it. Write down the words in the same order you see them on the display of your mobile phone and click Continue when you are done.
Step 9:
n this step, it is necessary to confirm your recovery phrase by clicking on the individual words in the same order as they were displayed in the previous step and click on Complete Backup and your wallet is created.
Connect to smartBCH
smartBCH is a sidechain for Bitcoin Cash and it is compatible with Ethereum's EVM. We will just connect our Ethereum style address to smartBCH chain now.
Chainlist
Probably the easiest way to add smartBCH to your MetaMask wallet is through the website chainlist.org. You can use this method with MetaMask installed in your browser as an extension.
Step 1:
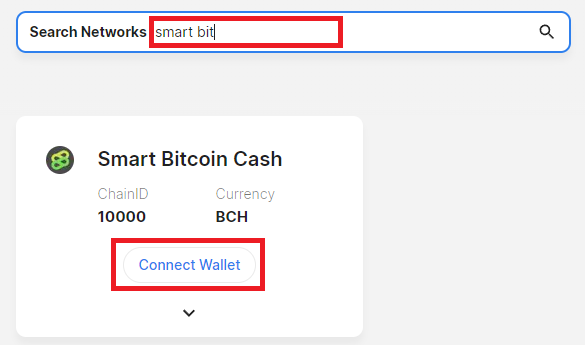
Open chainlist.org and just enter in the Search Networks box: smart bitcoin cash. When it finds the network, click on Connect Wallet
Step 2, 3:
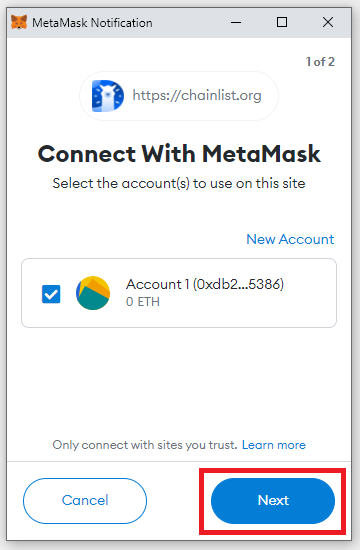
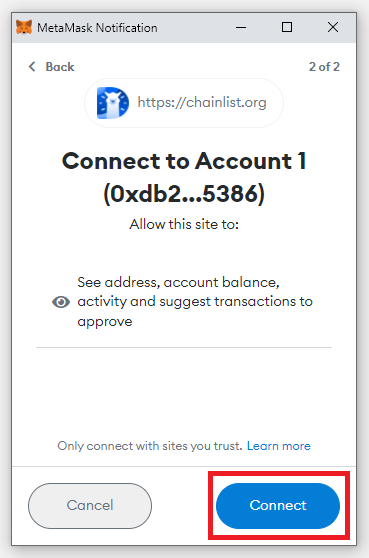
MetaMask will prompt you to confirm that you want to connect to chainlist.org with this account. Click Next and then click Connect in the next step.
Step 4:
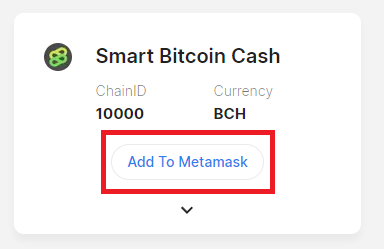
After connecting MetaMask, the "Add To Metamask" button will appear when you search for the Smart Bitcoin Cash network. Click on it.
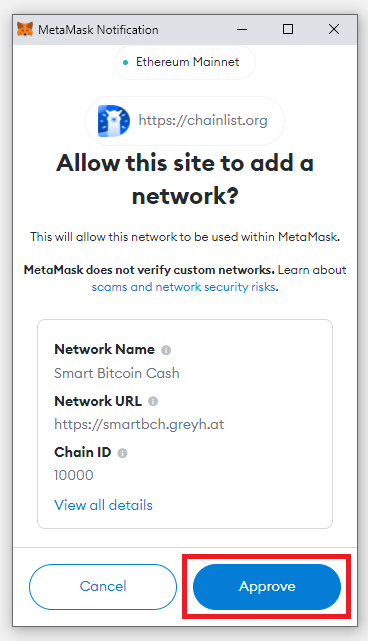
Step 6:
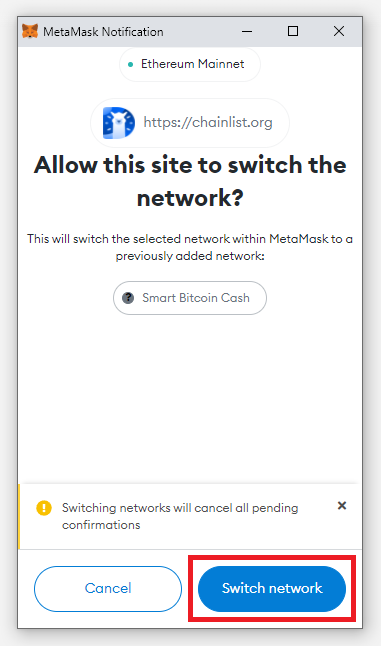
After adding smartBCH you have the option to switch directly to this network in your wallet by clicking on Switch network.
Step 7:
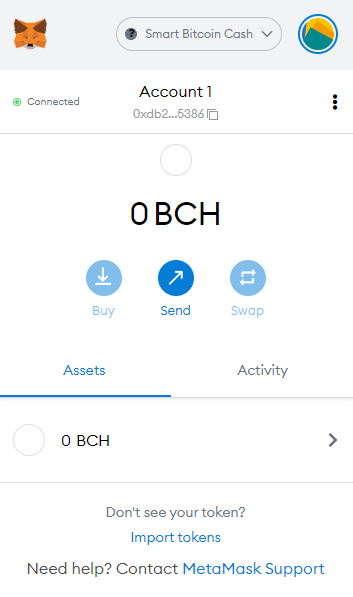
And it's done. We can now use the same address that we had on the ETH network a while ago on the smartBCH network.
Done:
Now it is necessary to transfer your Bitcoin Cash to the smartBCH, which we will do in the next step.
Add RPC manually
In this way you can set up smartBCH for MetaMask on desktop as well as in the mobile application.
Step 1:
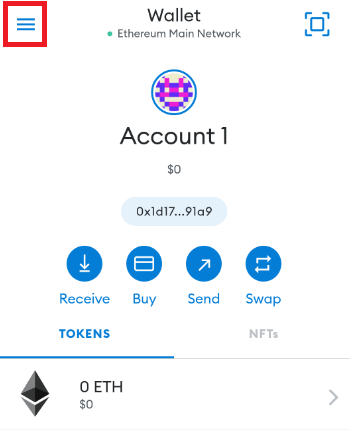
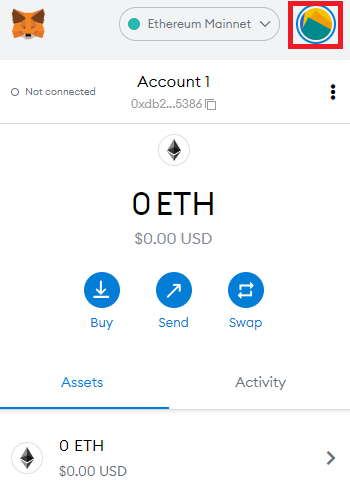
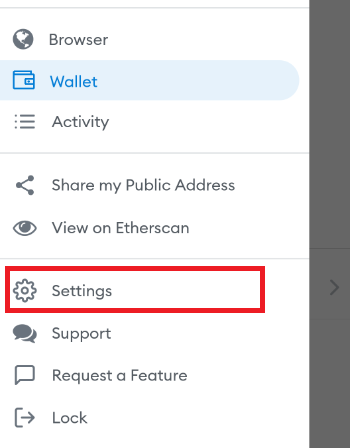
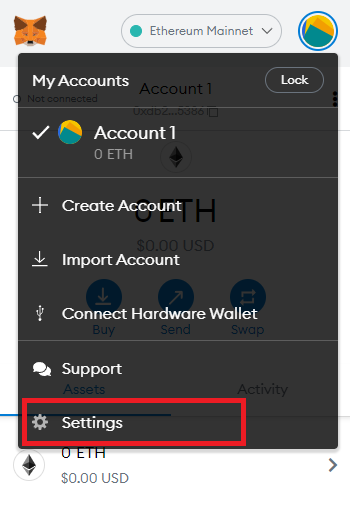
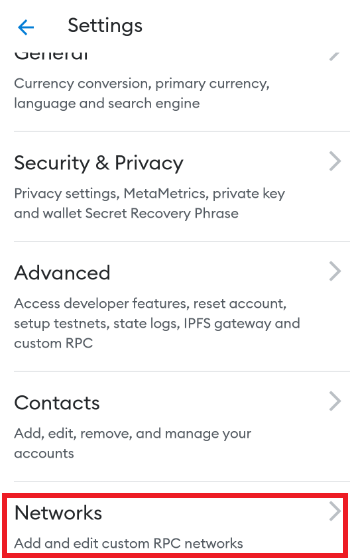
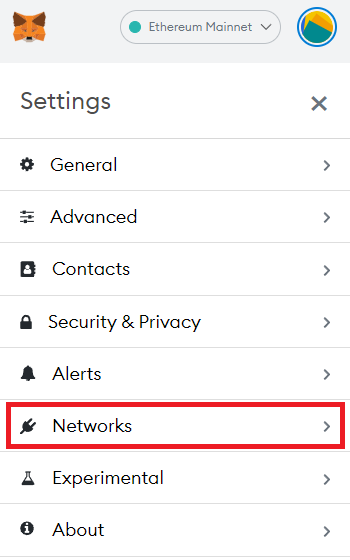
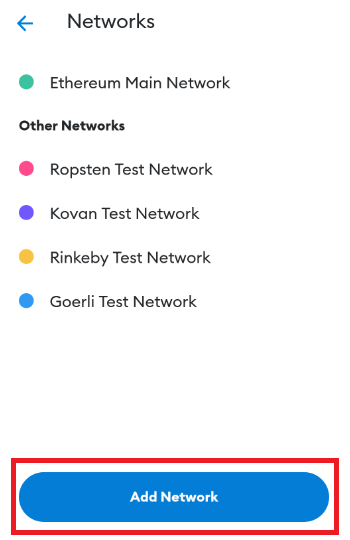
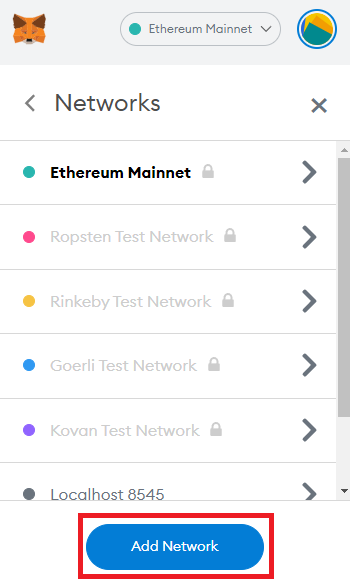
Open MetaMask on your mobile or in your browser. In case of a mobile phone, click on the menu in the upper left corner (three parallel lines below each other, picture on the left) and in case of MetaMask in your browser, click on the colored circle next to the name Ethereum Mainnet (picture on the right).
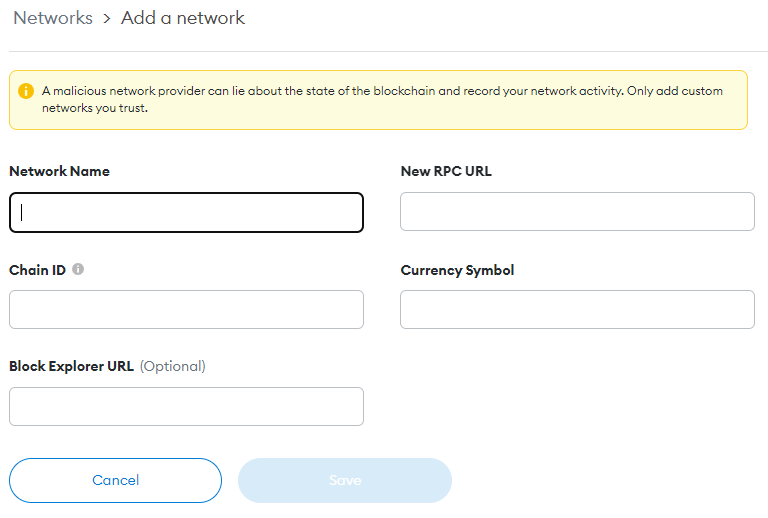
Fill these in as follows:
Network Name: smartBCH
New RPC URL: https://smartbch.fountainhead.cash/mainnet
Chain ID: 10000
Currency Symbol: BCH
Block Explorer: https://smartscan.cash/
If you are unable to connect to the new RPC URL, you can also try the following:
https://smartbch.greyh.at
https://smartbch.electroncash.de
Bitcoin Cash -> smartBCH
Once we are connected to the right chain (smartBCH) we can transfer Bitcoin Cash from our Bitcoin Cash wallet to our MetaMask wallet. At the moment, there are several bridges through which this can be done.
hop.cash bridge
Let’s show an example with hop.cash.
Step 1:
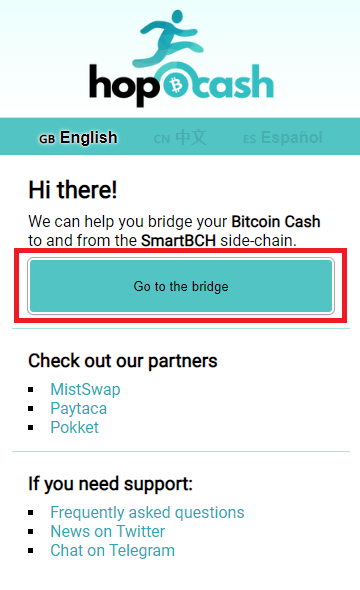
Open hop.cash page
Step 4, 5:
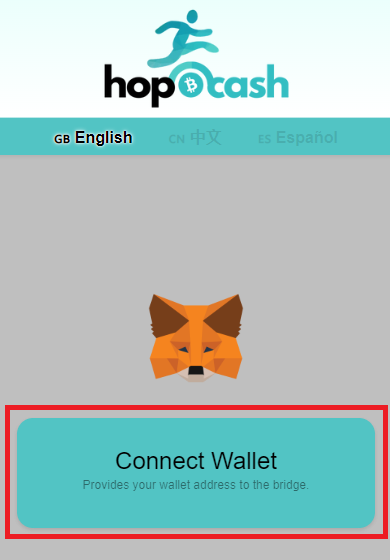
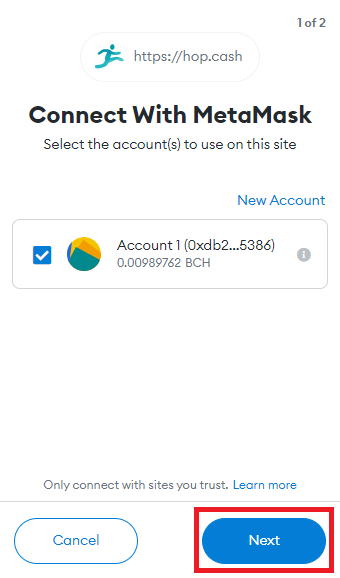
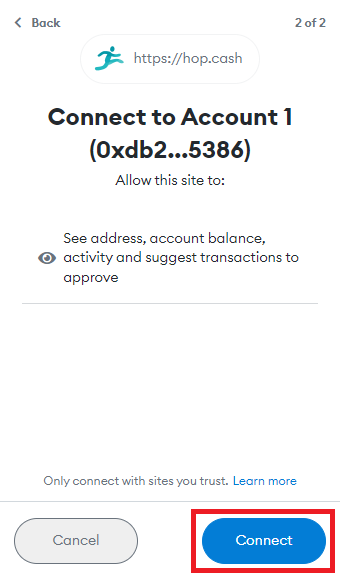
MetaMask wallet will open, asking you to select one of the accounts you want to connect to this page. (If you have only one address there, it will be pre-selected by default). Click Next and then Connect button
Step 6:
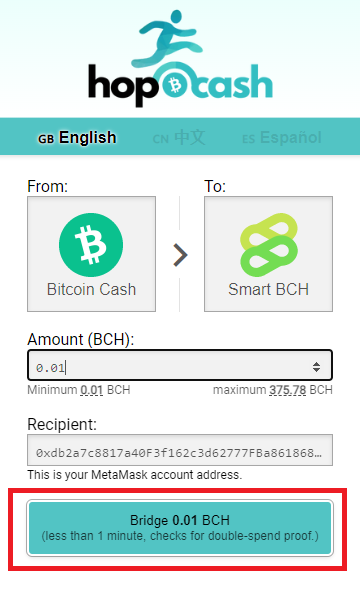
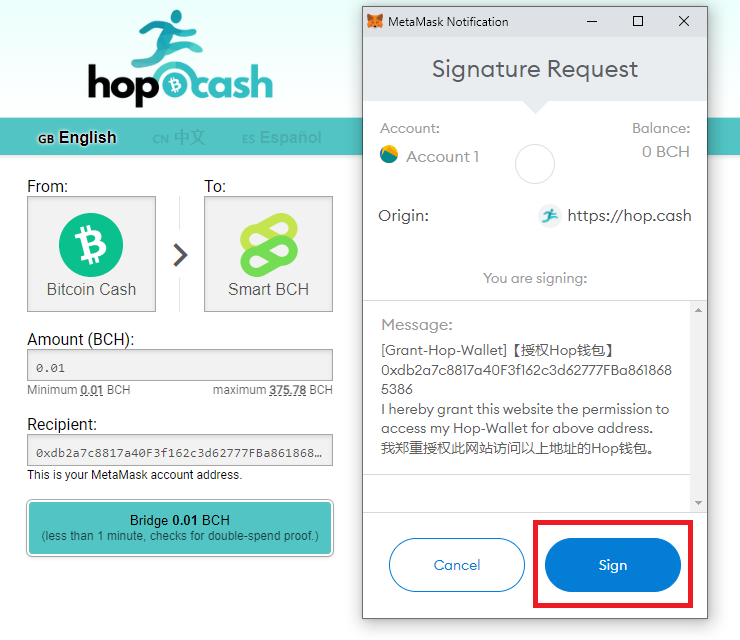
Once connected, you can see the bridge. On the left side is Bitcoin Cash icon and on the right side Smart BCH, that means you want to convert Bitcoin Cash to Smart BCH. You can see your current wallet address in Recipient field so just enter the Amount and click to Bridge button with your amount.
Step 8:
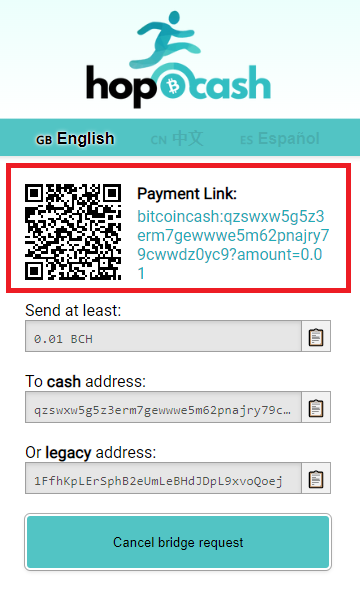
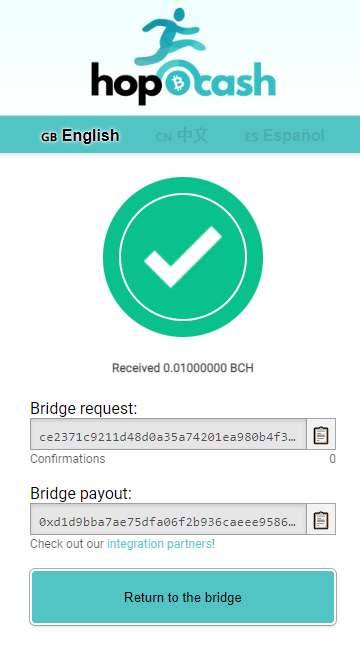
Now you will see QR code on the page. Scan this code with your Bitcoin Cash wallet and send your funds there.
How to Mint NFT
Step 1:
Open the minting page.
Step 4:
Confirm the transaction in your wallet and wait a moment, you will be notified about the status of the transaction.
Check NFTs on Oasis Marketplace
When you already minted your NFTs you can check them on Oasis Marketplace webpage to find out what are the numbers of your minted tokens so you can easily add them to your MetaMask wallet.
Step 1:
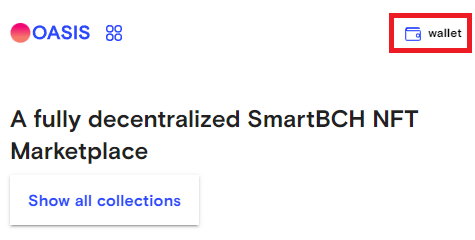
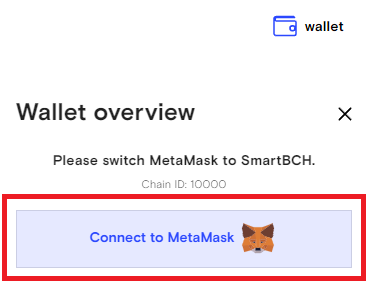
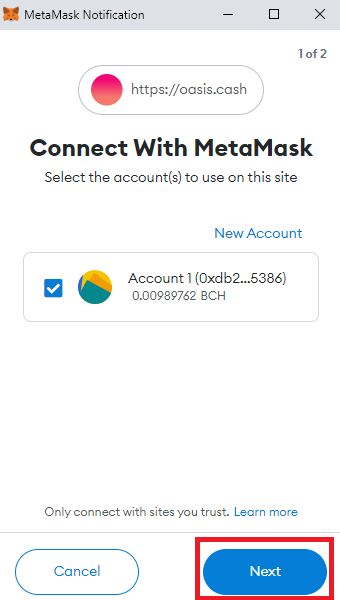
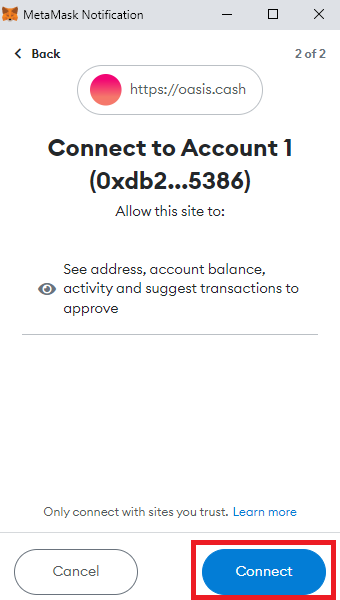
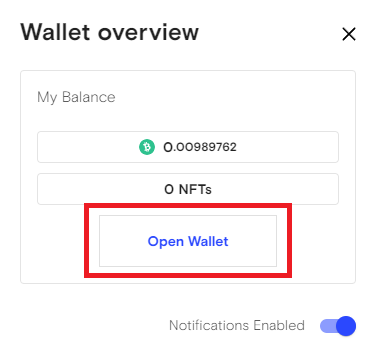
Open Oasis Marketplace webpage and click to wallet.
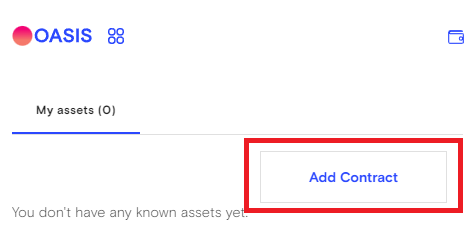
And it's done. Now you should see your minted NFTs. Numbers of mintend NFTs you can import into your MetaMask wallet in the next section: Add NFT to MetaMask
Add NFT to MetaMask
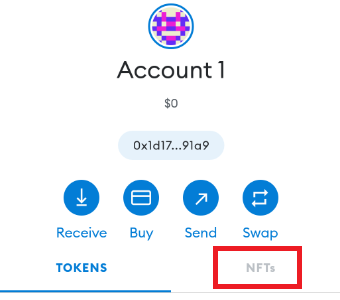
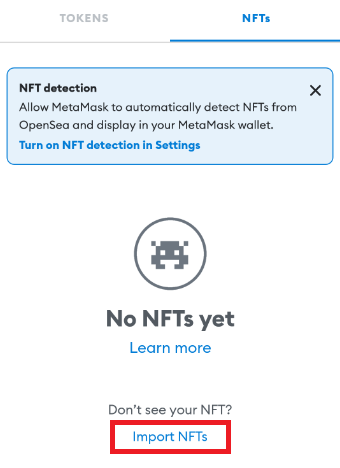
If you managed to mint our tokens in this step, we will show you how you can view them in your MetaMask wallet. Currently, it should be possible to view the NFT in MetaMask only in its mobile version.
Step 2:
At the bottom of the screen you will see Don't see your NFT? Import NFT's. Click Import NFT's
Step 3:
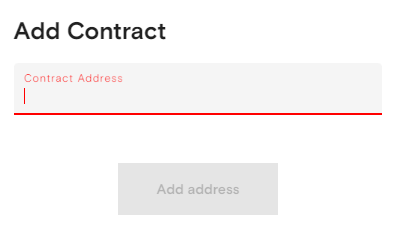
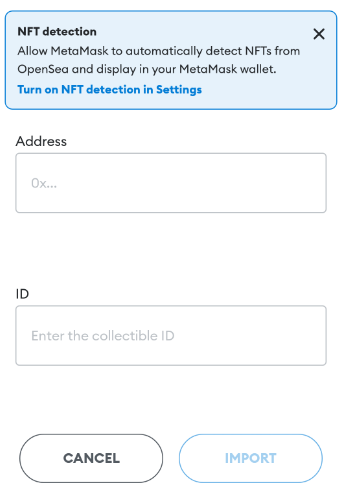
In this step it is necessary to enter two data, the address of the NFT token smart contract and the ID of the token that you managed to mint. We will state the address of the smart contract on the page at the moment it will be deployed on smartBCH and we can get the token ID, for example from oasis.cash, where you can sign up with with your wallet
FAQ
If any questions so here will be the answers... Nothing for now here.
Support
If this documentation doesn't answer your questions, so, please send message to our telegram group Telegram
We are located in GMT +1:00 time zone and we try to answer all your questions.
Changelog
See what's new added, changed, fixed, improved or updated in the latest versions.
For Future Updates Follow Us @telegram | @twitter
Version 1.12 (15 May, 2022)
- Updated Added section "Check your NFTs on Oasis Marketplace"
Version 1.11 (24 April, 2022)
- Updated Only visual changes for better readability
Version 1.1 (22 April, 2022)
- Updated Updated section for hop.cash bridge
Version 1.0 (1 April, 2022)
Initial Release
